Seamlessly Consuming Kafka Messages with EMQX Dedicated v5: A Step-by-Step Tutorial

Table of Contents
Introduction
Data integration seamlessly connects both self-hosted and cloud-based services using the powerful built-in rule engine with a ready-to-use configuration. This streamlined approach guarantees smooth interoperability across diverse environments, empowering users to effectively manage data flows and enhance system performance.
In the latest update of EMQX Dedicated v5, Data Integration enhances its capabilities by importing data from external services like Kafka and MQTT broker. These data sources can then be seamlessly processed within the rule engine, enabling the efficient forwarding of messages to subscribers.
In this tutorial, we’ll provide step-by-step instructions for setting up data source integration using Confluent’s fully managed Kafka service. You will see how effortlessly data can flow between these two systems, demonstrating the simplicity of the process in just a few steps.
You can check out this tutorial on transferring data to Kafka service to learn about the complete data flow between EMQX Platform and Confluent Cloud.
Step 1: Set up a Confluent Cloud Cluster
To begin using Confluent Cloud, visit Try Free Confluent: Managed Kafka on Any Cloud and create an account. Upon signing up, you will receive a $400 credit to use within the first 30 days.
1. Create a Confluent Cloud cluster
Once you have completed the sign-up process, create your first Confluent Cloud cluster. Select the plan that best suits your needs and follow the step-by-step instructions provided by Confluent Cloud. For this example, the default settings should suffice.

2. Generate an API Key
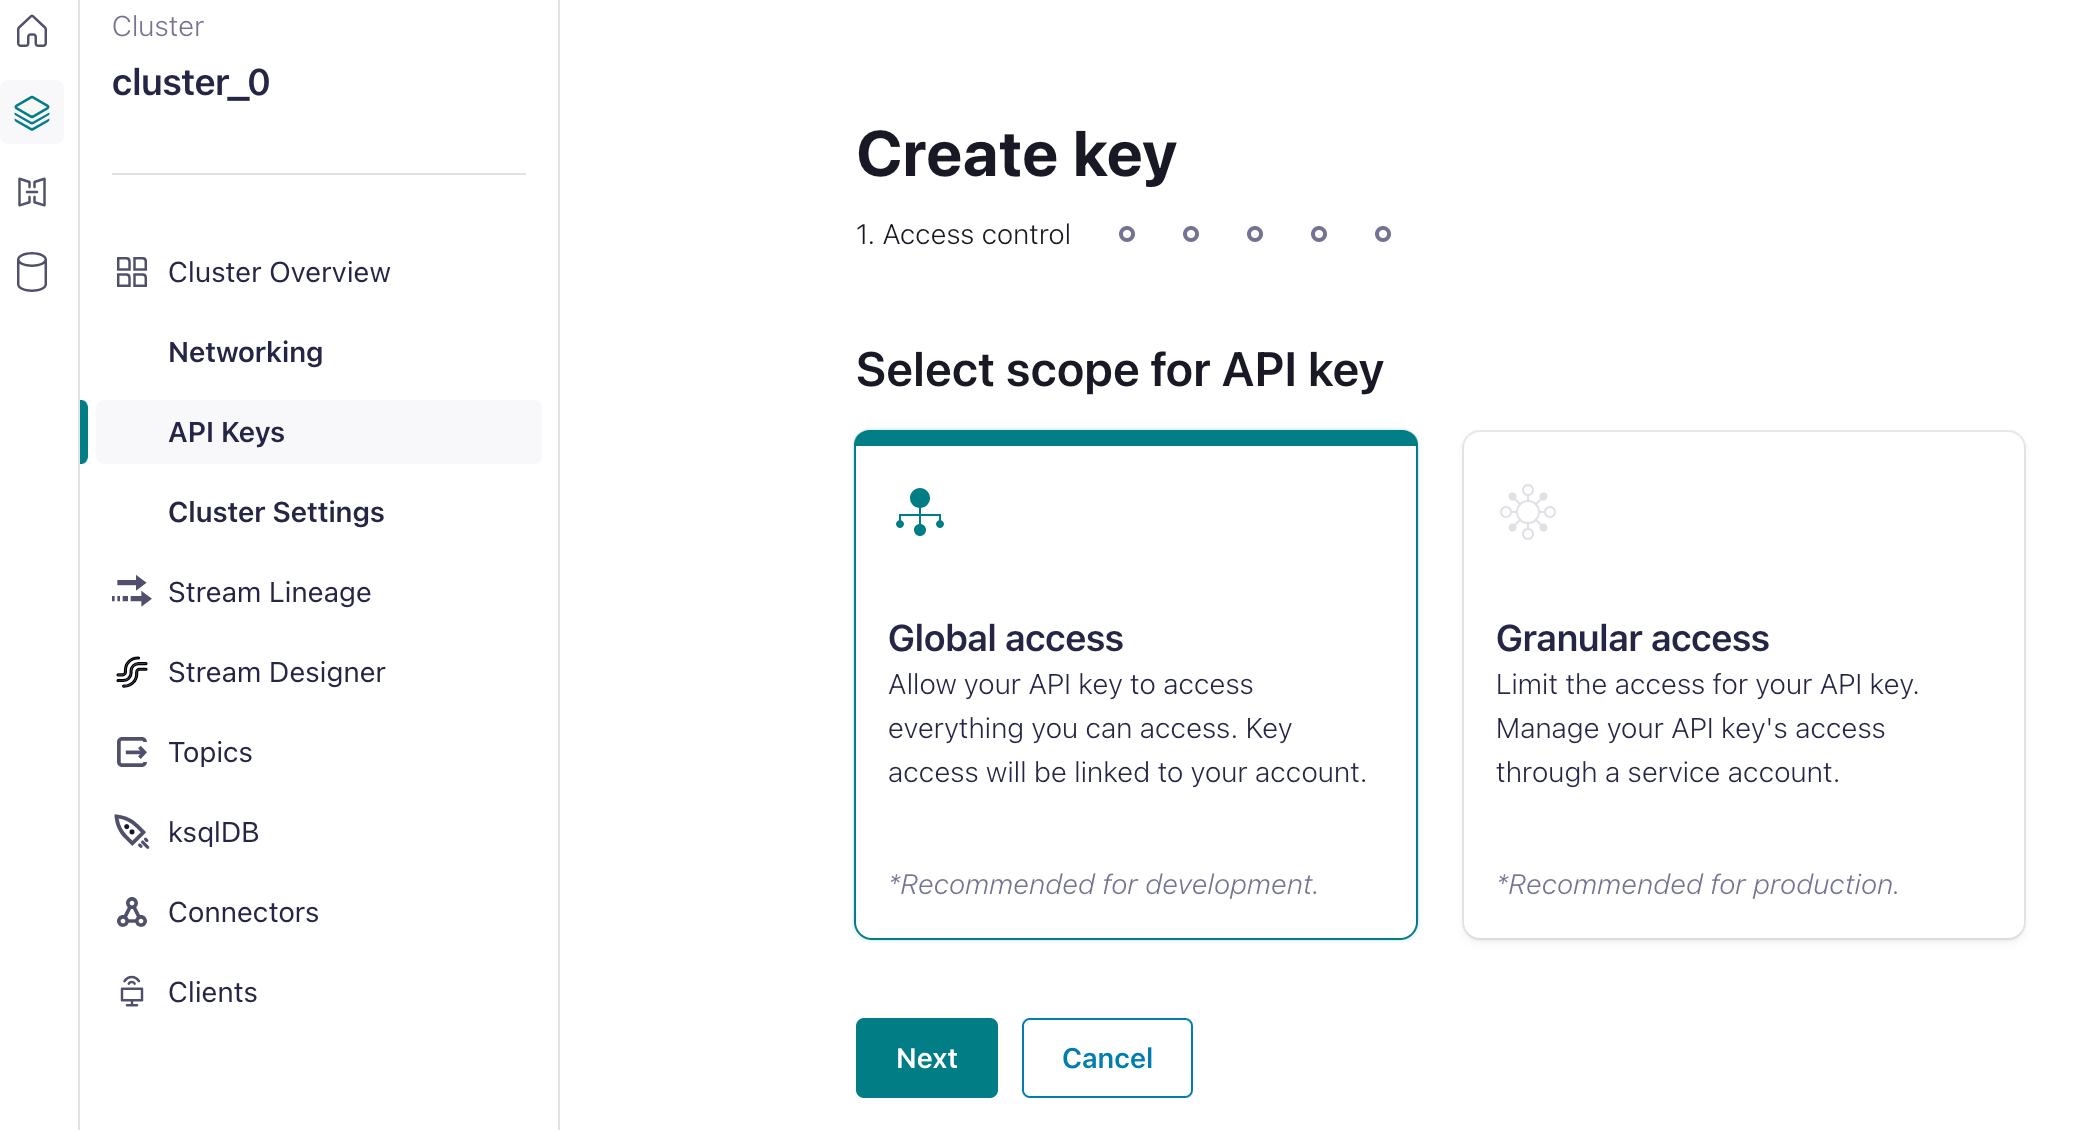
After creating your first Confluent Cloud cluster, navigate to the API Keys section within the cluster overview and select ‘Create Key’. Generate an API key with global access and store the generated key in a safe place. This API key is crucial for authenticating your EMQX deployment with your Confluent Cloud cluster, enabling seamless data integration between the two. It’s highly recommended to use granular access in your production environment.
](https://assets.emqx.com/images/8ba3398d8c4514ce4cf9c77753704192.png?x-image-process=image/resize,w_1520/format,webp)
3. Define a Topic
Create a topic to use as a Kafka data source. In the navigation menu, select ‘Topics’ and then create a topic using the default settings. For this tutorial, we named the topic ‘emqx’. It’s not necessary to create a schema for this example.

After creating your topic, navigate to the ‘Messages’ tab. We can simulate sending messages on the topic at a later time.

Your Confluent Cloud cluster is now set up and ready for the next step.
Step 2: Set up an EMQX Dedicated Deployment
Register for an EMQX account to access a 14-day free trial of an EMQX Dedicated deployment. No credit card is required.
1. Create a Dedicated Deployment
Log in to the EMQX Platform Console and click the ‘New Deployment’ button. Select the ‘Dedicated’ plan and set the configuration of a Dedicated deployment.

It’s recommended to choose the same region as your Kafka cluster. For this tutorial, choose the N.Virginia region and the 1,000 tier, leave the EMQX version as the default setting (v5), and then click the 'Deploy' button.

2. Add a Credential for the MQTT Connection
When the deployment is created, navigate to ‘Access Control’ in the deployment console, then click Authentication in the submenu. Click the ‘Add’ button on the right and provide a username and password for the MQTT connection. For this example, we will use "emqx" as the username and "public" as the password for the MQTT client connection.

3. Enable NAT Gateway
Before setting up data integration, we need to enable the NAT gateway. By default, Dedicated deployment is deployed in a VPC, which cannot send data to other services over the public network.
There are two methods to enable external data transfer:
- Enable the NAT Gateway: this allows the broker to send data through the gateway.
- Set Up VPC Peering: This method is contingent on whether the target cloud service supports VPC peering.
In this tutorial, we will opt for the first method. On the deployment overview page, navigate to the ‘NAT Gateway’ tab located at the bottom and enable the NAT Gateway service by clicking ‘Subscribe Now’.

With these steps, your MQTT broker is now operational and ready for use. Let’s now proceed to Step 3.
Step 3: Set up Data Integration with Kafka Consumer Connector
EMQX Dedicated provides over 40 native data integrations. In the v5 deployment, Data Integration supports data inputs from other systems or services.
1. Create a Data Input Connector
Go to the Data Integrations page and select ‘Kafka Consumer' under the 'Data Input' category.

On the connector settings page, enter the required information in the ‘Endpoints’ section for the ‘Bootstrap Hosts’. Select ‘Authentication' as Basic auth and 'Mechanism’ as Plain. Input the key and secret generated in the ‘Create API Key’ step into the ‘Username’ and ‘Password’ fields. Click ‘Test’ to verify the connection to the Confluent server.

After passing the test, click the ‘New’ button. A confirmation message will appear indicating that the resource has been successfully created. Under ‘Connectors’, you will see the newly created Confluent connector.
2. Create a Rule
Create a new rule by clicking the ‘New Rule’ button in the connector list. When creating a rule associated with a Source Type connector, you first need to set up an input action. This action will specify how data is imported from the connector. In the Kafka action (source), you need to input the topic from which the broker will consume messages.

This rule will process messages from the Kafka topic emqx, enriching the JSON object with ‘key’, ‘value’, and ‘topic’ information.
key: the key of a message in the topicvalue: the value of a message in the topictopic: the Kafka topic
SELECT
  key as key,
  value as value,
  topic as topic
FROM
  "$bridges/kafka_consumer:source-41d05f5a"

3. Add an Action (sink)
Click ‘Next’ to add an action as a sink to output the processed messages by republishing the messages to an MQTT topic.
- Topic: The MQTT topic to forward to. In this tutorial, enter
sub/${topic}, meaning to add asub/prefix to the original topic for forwarding. For example, if the original message topic ist/1, the forwarded topic would besub/t/1. - QoS: Message publish QoS, choose from
0,1,2, or${qos}, or enter placeholders to set QoS from other fields. Here, choose${qos}to follow the QoS of the original message. - Retain: Choose
true,false, or${flags.retain}, to confirm whether to publish messages as retain messages. You can also enter placeholders to set retain message flags from other fields. Here, choose${flags.retain}to follow the retain message flag of the original message. - Message Template: Template for generating the forwarded message payload. Leave blank by default to forward the rule output results. Here, enter
${.}to forward all fields in the rule engine.

With these steps, you have successfully integrated Confluent Cloud and EMQX Dedicated. Clients can subscribe to messages in Kafka topics that have been processed by the rules engine.
Let’s proceed to the final step to ensure everything is working as expected.
Step 4: Verification
To publish messages, you can use any MQTT client or SDK. In this tutorial, we’ll utilize MQTTX, a comprehensive MQTT client tool offered by EMQ.
1. Connect MQTTX
In MQTTX, click ‘New Connection’ and complete the connection form:
- Name: Enter a connection name of your choice.
- Host: This is the MQTT broker connection address, available on the EMQX Dedicated overview page.
- Port: The MQTT broker connection port, also found on the EMQX Dedicated overview page.
- Username/Password: Use the username and password specified in the Authentication settings.

2. Subscribe to Topic from EMQX Dedicated
Subscribe to the topic 'sub/#' using the wildcard '#'.

3. Simulate generating the data from Confluent
In the Confluent Console, navigate to the topic page and click 'Produce new message'. Send a message with payload info.

4. Check the Data in MQTTX
MQTTX will receive the data and pop the message in the window.

Integration Wrap-Up
EMQX Dedicated Data Integration’s capability to import data sources expands its application scenarios for IoT. Data can be forwarded from clients to the cloud service for processing and also be subscribed to within the message queue for message circulation. The seamless integration between the EMQX Platform and Confluent Cloud enables businesses to efficiently collect, forward, and process data, unlocking valuable insights and propelling digital transformation initiatives forward.
